Showing posts with label spray paint. Show all posts

Tuesday, June 5, 2012

Lots and Lots of Spoons turned Wreath(s)

Some of you may remember me talking about the Pancake Breakfast/Auction Fundraiser Hubby and I Co-Chair.  This year's theme was "Greek".  You can see us in all of our glory here.

Anyway, the breakfast is held in a school gym.  In planning the table decor, I knew I wanted something that would be big, so it would be noticeable in the gym, yet I didn't want it to obscure anyone's vision.

Here's what I made:


The idea came from "The Nester" over at the blog Nesting Place

You see, every year this fundraiser takes place and every year once the events are over, the theme for the following year is announced.  Last year's theme was Hollywood and when they announced that this year's theme would be Greek, my mind was on full speed.  I had  remembered seeing some cool laurel leaf looking wreaths somewhere, I just had to remember where.

Once I found them again, I filed it into my "auction ideas" folder.

I was absolutely going to make them, but initially I hadn't planned on using them as centerpieces.  I was planning on hanging them on the doors to the entrance.  But as I thought more about it, I decided they would make fabulous centerpieces.  Big, open, perfect for the theme.... just right :)

So I gathered my supplies, lots and lots of plastic spoons, and lots of green spray paint.

First I glued my spoons together.  Each wreath I made took about 50-52 spoons.  My placement of the spoons was based on trial and error.  I didn't want the wreaths to look too "tight" But I didn't want them to be enormous either.  Once I that figured out, I glued and glued and glued some more.

 I used hot glue and basically put a dollop of glue on the lower back part of the "spoon", glued that to the "neck" of the next spoon, then flipped it over and put a dollop of glue where the two spoons met at the bottom/lower middle.  I admit, I used lots of glue, I didn't want these coming apart as they were on the tables.

Once all of my wreaths were assembled (I made 13), I set out to spray paint them green to mimic an actual laurel.   You could leave them white, or paint them whatever color you desire.  I used lots of spray paint, and it took many coats to get each wreath thoroughly covered ~ there are lots of nooks and crannies on these babies!


Next up, creating a stand so they could sit on the tables and not tip over.  Lucky for me, we had just thrown out Sassy's old book shelf that had finally collapsed under the weight of all her precious books (this was a cheapy $20 bookcase that we purchased for her nursery 11 years ago).  Using the shelves and sides of the book case, Hubby cut 13 10x10" squares (round ones would look pretty nice!).  I purchased dowels (however in the picture below we made a "trial" stand and just used a 1x2 we had on hand) which we cut down to 23 3/4" (this will vary depending on the size of your wreath).  He then drilled a screw into the bottom of the base and into the dowel.


I hammered a nail into the top and spray painted the bases gold.

Using ribbon that was donated, I tied the wreaths to the stands using the nail.

Voila ~ an easy wreath and simple wreath stand, perfect for our event.


Monday, November 21, 2011

New Again

My Grandpa was an antique collector.

So much so that when he passed away, my family held a auction sale.  5 days one week.  1 more day a little while later.

I was a poor college student at the time, so I didn't have the opportunity to acquire much.  I did however, get this chair

(it already had one seat recover ~ the covering it had when I purchased it, left something to be desired).


No, it isn't an expensive piece of furniture, but I love that it is a folding chair and while it probably was never in his house, it reminds me of my Grandpa whenever I walk past it.

Anyway, I was ready to give it another face lift.

I decided to paint it.  However I didn't want to paint the metal folding brackets.  Not that we fold it often, or ever really, but I didn't want them to chip if they did and I thought they created some interest.  So first things first.  I took it all apart ~ and said a little prayer that I would remember where all of the screws went  so I could put it back together.


I wiped it down.

Sprayed it with a coat of Kiltz primer.

Then with a few coats of satin white spray paint.


Recovered the seat.

And miraculously put it back together!

However, once it was together ~ minus the seat, I felt like it was too bright.... too white.


So, I pulled out my sandpaper.

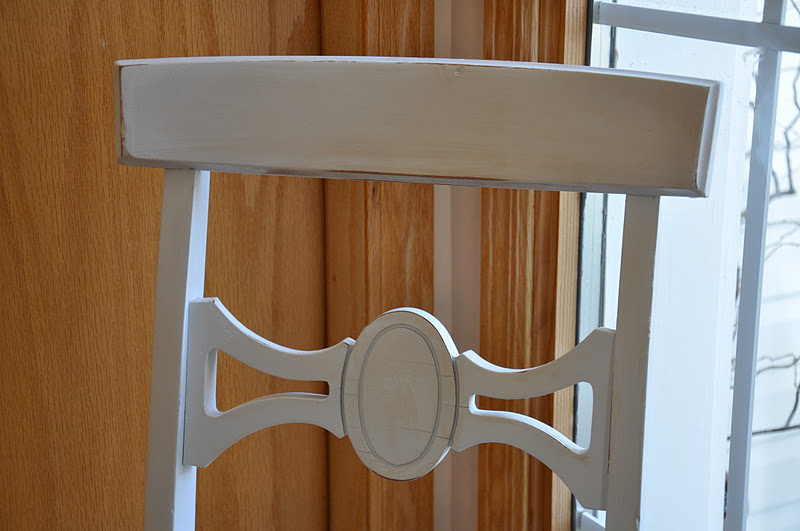
Roughed it up a bit, to give it some signs of wear and tear.

Then added a bit of stain for a little depth.

Voila ~ My old chair with a bit of a face lift:


I love it!


Monday, May 16, 2011

Brightening Up

I don't know about where you live, but up until today the weather has been cloudy, drippy and dreary.  So I decided to add a little sunshine to my front entry.

Here is the before, in all it's new spring wreath and dirty glass door glory:


I purchased this chair from Sam's Club (I was too impatient to find one on Craig's list, thrift store, or garage sale).


Using some bright yellow spray paint, I spruced that baby right up for a fabulous pop of color.


Little Smiley, decided she needed a chair too, so she pulled an old rusty one (given to us about 10 years ago by our sweet elderly neighbor at the time).


The branches I had picked up off the ground one morning while walking my dog ~ who by the way likes to hang out in the cabinet I guess.

I couldn't find her one day and went to go shut the cabinet door (although they are gettting better, no one in my house seems to think it is necessary to fully shut all of our cabinet doors) and someone popped up.


Anyway, Hubby was attempting to clean out our garage and was tired of moving my lovely branches from point A to point B and back again.  So I propped them up in a planter, via some landscaping bricks,  stole some lava rock from around the house and filled it up.


Works for me, at least for a couple of weeks until I'm ready to do some flower planting!

Ahhh..... much better!


And of course, the sun is out and shining today :)


Tip Junkie handmade projects


81. A first Birthday 
82. Celebrating an accomplishment 
83. A clean house 
84. Brighter colors 
85. Laughing with my in-laws 
86. My family who knows how to rally together 
87. My beautiful 10 year old daughter 
88. My Amazing husband 
89. Warm water, the smell of chlorine and smiles at the indoor pool 
90. My mom

Monday, November 15, 2010

Yarn Storage

I started with a couple of these:


Spray painted them ~ I used yellow and silver (no photos so you'll have to use your imagination ☺)

Glued them together ~ I used gorilla glue ('cause that's what was close) ~ then clamped them together until the glue dried.

Hung them up on the wall ~ by  driving a screw through the bottom of a couple of the cans and into a stud (in my beautifully unfinished, windowless, storage/craft hole in the basement ~ and I say that lovingly ☺ ~ which is why the pictures are SO good!)


Finally, I put some yarn in them.  I have lots more yarn, but as much as I like coffee, I just can't seem to go through cans that quickly, so I'll be saving cans and adding them in.

Really though, you don't have to put yarn in them ~ spray paint, brushes, whatever your heart desires.


Monday, May 17, 2010

A window where there wasn't


Yesterday, I showed all of you my "new" laundry room!


I.LOVE.IT.

BUT.....

It is lacking something.

For starters, a window.

Hubby and I talked about ripping out the wall to install a window.

These talks didn't last long.

Reasons?

#1 ~ Cost

#2 ~ The view

I really like my neighbor, but I don't want to look at this ~ every time I'm in my laundry room:


So, enter Jen from Hope Studios.

I was remembering a post she did using an old window and voila.... A PLAN WAS BORN!

I searched for old windows.  I was looking for a certain size, and I knew I wanted panels.  I looked at our local reuse center ~ nothing ~ well in regards to size, shape and look.

And then one day I was shopping.  And I spotted a window. It was new, unfinished and inexpensive!  JUST WHAT I WAS LOOKING FOR!


I primed this baby.

Painted it black.


Gave it a couple of coats of white.

Sanded  a bit to weather it.

Wiped on some mahogany stain

and ......


Alrighty.

I have a window, now what?

I had a picture enlarged.
Cut it into pieces that would fill each panel,
then taped them in.


Flipped it over, hung it up and VOILA...


a  room


with a


View

The only bummer now is when I'm doing laundry, I look out my window and see my hubby pulling the kids in the tube behind the boat on a gorgeous summer evening while I'm stuck inside.

Not sure I like that idea.
HA!

Don't forget, today is Tuesday and that means PARTY DAY!
Come be inspired!


AND 
 

don't forget about the linky party and giveaway that starts here on THURSDAY! In honor of my 1 yr blog anniversary, I want to know why YOU started your blog!
Go here for more details!

Don't forget, today is Tuesday and that means PARTY DAY!
Come be inspired!

DIY Day @ ASPTL