Showing posts with label decoration. Show all posts

Thursday, December 6, 2012

Embracing our Tree


Well, here I am.  Finally taking the time to sit down at the computer and get a few words out.  It's been a couple of crazy weeks ~ Thanksgiving travels, Hubby gone for a week, kid stuff, home improvements.  The list goes on and on, but finally I'm stopping to breath and do one of my favorite things.  Blog.

And since today is Thursday,  I thought I would embrace the camera.  And this is easy for me this week.  You see, last night we decorated our Christmas tree.  Christmas music was playing in the background.  The kids were arguing over whose ornament was whose and who got to hang up the next one.... it was pure loveliness.  No really though, besides the occasional, "No, that's my ornament, I get to hang it up."  and "Moommm, can I do the next one?" We had a fun time.


Once the tree was decorated, of course I had to break out the camera.  

First for a first look at the fully decorated tree


Then a couple in front of it

Sassy girl and I


Hubby and I


It was a fun night.  Full of reminiscing over ornaments (like the ones that were glued back together after the fully decorated tree tipped over a couple of years ago), enjoying the picture ones, seeing how much everyone has grown and of course personal ones ~ like Smileys favorite "Minnie and Mickey" ornament, Action's "Elvis" ornament, Sassy's ice skating ornament and the "Santa Clause" ornament I painted when I was in 8th grade ~ way back in 1989 :)


Tuesday, June 5, 2012

Lots and Lots of Spoons turned Wreath(s)

Some of you may remember me talking about the Pancake Breakfast/Auction Fundraiser Hubby and I Co-Chair.  This year's theme was "Greek".  You can see us in all of our glory here.

Anyway, the breakfast is held in a school gym.  In planning the table decor, I knew I wanted something that would be big, so it would be noticeable in the gym, yet I didn't want it to obscure anyone's vision.

Here's what I made:


The idea came from "The Nester" over at the blog Nesting Place

You see, every year this fundraiser takes place and every year once the events are over, the theme for the following year is announced.  Last year's theme was Hollywood and when they announced that this year's theme would be Greek, my mind was on full speed.  I had  remembered seeing some cool laurel leaf looking wreaths somewhere, I just had to remember where.

Once I found them again, I filed it into my "auction ideas" folder.

I was absolutely going to make them, but initially I hadn't planned on using them as centerpieces.  I was planning on hanging them on the doors to the entrance.  But as I thought more about it, I decided they would make fabulous centerpieces.  Big, open, perfect for the theme.... just right :)

So I gathered my supplies, lots and lots of plastic spoons, and lots of green spray paint.

First I glued my spoons together.  Each wreath I made took about 50-52 spoons.  My placement of the spoons was based on trial and error.  I didn't want the wreaths to look too "tight" But I didn't want them to be enormous either.  Once I that figured out, I glued and glued and glued some more.

 I used hot glue and basically put a dollop of glue on the lower back part of the "spoon", glued that to the "neck" of the next spoon, then flipped it over and put a dollop of glue where the two spoons met at the bottom/lower middle.  I admit, I used lots of glue, I didn't want these coming apart as they were on the tables.

Once all of my wreaths were assembled (I made 13), I set out to spray paint them green to mimic an actual laurel.   You could leave them white, or paint them whatever color you desire.  I used lots of spray paint, and it took many coats to get each wreath thoroughly covered ~ there are lots of nooks and crannies on these babies!


Next up, creating a stand so they could sit on the tables and not tip over.  Lucky for me, we had just thrown out Sassy's old book shelf that had finally collapsed under the weight of all her precious books (this was a cheapy $20 bookcase that we purchased for her nursery 11 years ago).  Using the shelves and sides of the book case, Hubby cut 13 10x10" squares (round ones would look pretty nice!).  I purchased dowels (however in the picture below we made a "trial" stand and just used a 1x2 we had on hand) which we cut down to 23 3/4" (this will vary depending on the size of your wreath).  He then drilled a screw into the bottom of the base and into the dowel.


I hammered a nail into the top and spray painted the bases gold.

Using ribbon that was donated, I tied the wreaths to the stands using the nail.

Voila ~ an easy wreath and simple wreath stand, perfect for our event.


Tuesday, April 19, 2011

Yarn Eggs ~ take 2

The kids and I made Yarn Eggs last year before Easter.

You can check that post out here.

I hadn't planned on making them again this year, but Sassy was concerned that we didn't have any Easter decorations up.  So, one day while Sassy and Action were at school and Smiley was down for a nap, I set out to make some small yarn eggs.

I used:

Water Balloons (I wanted smaller eggs than last year)
Bright colored Embroidery Floss (that I took out of a friendship bracelet making kit)
Glue 
and
Water


First I watered down my glue and blew up my balloons.

Then I took my embroidery floss, dipped it into the watered down glue and wrapped, wrapped and wrapped it around my balloons.

 I laid them out to dry.


When they were dry, using my finger, I loosened the floss from the balloon.  


Then I popped the balloon and pulled it out


Voila, cute little Easter Eggs.


And Sassy feels so much better now that we have some Easter decorations up.


Oh, and that fabulous framed Easter Subway Art you see, 
you can get that here courtesy of Chessa from Antsi-Pants


Tip Junkie handmade projects


Monday, April 11, 2011

Lime Green, Purple, Turquoise and Peace


Hard to believe my little Sassy is a not so little 10 years old already.
The years have flown by.
Too Fast.

Anyway,  she recently celebrated by having a few (meaning 6) girls sleep over.  I think she would have invited 15, but I had to draw the line at 6 and she had to figure out who she wanted to invite (the fact that a couple of her friends were away for spring break made the decision a little less stressful).

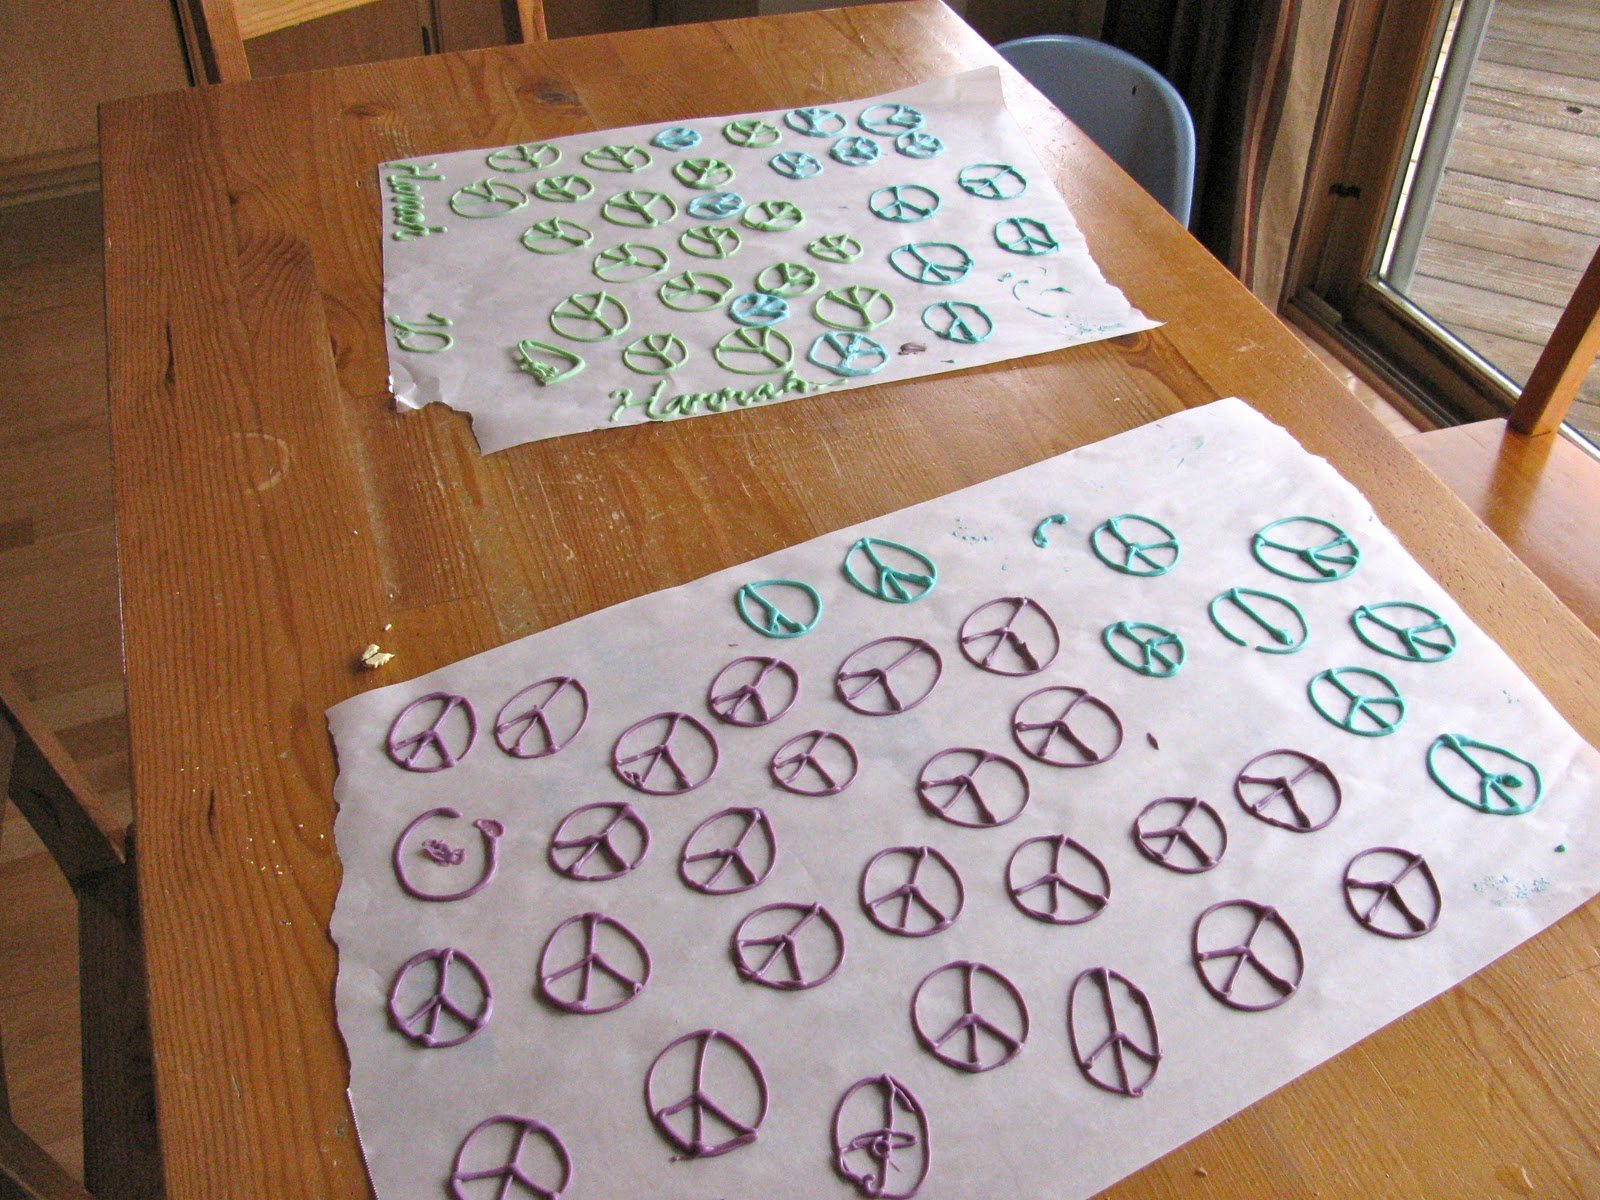
She wanted a colorful party ~ turquoise, lime green and purple.


And 2 days before the big event, she finally decided she wanted her favorite "yellow cake with chocolate frosting" (yellow boxed cake that is, and the frosting recipe well that is my Mother-in-Laws, and you can get that by clicking here).  Except in the form of cupcakes.  And with peace signs on them.

So.... I purchased a bag of white candy melts and a bag of lavender candy melts as well as some candy coloring (don't use regular food coloring for the candy, use an oil based candy color or you will end up with a thick mess)

I melted and colored my white candy melts turquoise and lime green, then piped them in the shape of peace signs onto parchment paper.  I also melted the lavender melts and piped them out as well.


Super easy to make 


 and


and Sassy LOVED them!


Tuesday, October 5, 2010

Fall Decor

Now that the kids are back in school, football season has started and the man on the news stated matter of fact that the autumnal equinox occured Sept. 22, 2010, at 11:13 p.m. EST, like it our not, fall is here.

At least where I live ~ unlike so many of the places my bloggy friends live ~ we do have fall, it has been getting cooler.  Actually, yesterday when I took our dog for a walk at 7am, it was 31° out. Brrrr...... 

So, I've finally decided to accept it, and embrace it.  After all, fall is my favorite time of the year!


Goodbye Summer


Hello Fall


(Hmmmm, notice anything?)